Introduction
The toolchain is the combination of elements which enable a PIC Embedded Developer to envisage, design, create and deploy an embedded design. The PIC Microcontroller has been available on a global scale for many years and have continually delivered a product able to meet most applications.
Although the PIC16F and 18F family is well known, the PIC product offering also includes 16-BIT and 32-BIT devices in the PIC24/PIC33 and PIC32 families, respectively. ARM based CEC devices are also more recently available ensuring that the product offering has continued to adapt and deliver on client requirements.
Items for your work bench
A few items are required to enter the arena. You need a PIC device, a means to write code, a means to program the device and a means to power it. If you wanted to go bare bones, you could
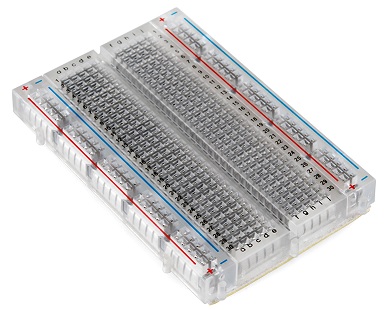
use a simple bread board, wire the circuit up with jumper wires, and even scrounge power via a USB cable. This would be sufficient to get you going. In the image below, an example breadboard is shown. This is ideal for those starter projects as there is no need for a soldering iron and the need to solder along with the
additional equipment needed for such. However, in the long run this approach is limited and you will need to look at expanding your workbench tool kit.
Once you have acquired one, the next step would be to decide on a PIC to use. Since there is a wide range of devices that cater to many speicific applications, starting on one of these devies can be a bigger challenge. A simpler, general purpose device is more advisable
and will aid in rapid skills development. Keep in mind that embedded developers get better at it just by working on projects and as your experience grows, so does your confidence. If you are looking at something simple to work with, the PIC16F1847 is an ideal device. For
projects with increasing complexity, the PIC18F45KXX family has both 28 and 40 pin devices which can be worked with. Sinve they are from the same family, you code can be easily migrated between devices.
Sample Project
Shown below is an example project written in the C language. C is the most common language, and many languages are based on C, even if not following all syntax rules and conventions. Once you have written your project, you will need to compile the cde into a hex file,
and download the program to the device's flash memory using a programmer.
We will have a look at development environment's shortly.
                            /*
                                    Date          : May 2019.
                                    Author        : Michael A Havenga

                                Test configuration PIC :

                                    MCU             : P18F45K22
                                    Dev. Board      : BlueBerry - P40
                                    PIC Compiler ver : v7.2.0.0
                                ---
                                */

                                #define OFF 0
                                #define ON 1

                                int i;
                                int count;

                                void systemInit(){

                                   ANSELA = OFF;
                                   ANSELB = OFF;
                                   ANSELC = OFF;
                                   ANSELD = OFF;
                                   ANSELE = OFF;

                                   PORTA = 0x00;
                                   PORTB = 0x00;
                                   PORTC = 0x00;
                                   PORTD = 0x00;
                                   PORTE = 0x00;

                                   TRISA = 0b00000000;
                                   TRISB = 0b00000000;
                                   TRISC = 0b00000000;
                                   TRISD = 0b00000111;
                                   TRISE = 0b00000000;

                                   // PWM Setup and configuration
                                  C1ON_bit = 0;                       // Disable comparators
                                  C2ON_bit = 0;

                                  Delay_ms(100);
                                }

                                void applicationInit(){
                                        /*

                                        */
                                }

                                void applicationTask()
                                {
                                   if(!PORTD.B0){
	                                /*
		                                Enter your code here
	                                */

	                                }
                                }

                                void main()
                                {

                                    systemInit();
                                    applicationInit();

                                    while (1)
                                    {
                                        applicationTask();
                                    }
                                }
Programming the Device
Programming the device will always start with an additional piece of hardware we call a programmer. This may be in the form of a PICKIT, of which a revision 4 is currently available.
You can bypass the need to own one of these devices by purchasing a dev kit that has a bootloader installed. This technique means that software is installed on the device, and this enables new code to be
loaded using a USB to UART converter or a USB bootloader (device dependant) to install the code. If you are not planning extensive development, this method is advisable as it cuts costs.
Build and prototype . . .
Building an embedded application has become simpler and easier to achieve. The common architecture shared by the
BlueBerry (DEVCC) range of pic development boards
enables the developer to migrate the entire shield from PCB to PCB depending on the application requirements. The change in base means that the application benefits
from the new peripherals, but with no change required to connections made.
NOTE : Although PICs share common port based pinout and compatiability in the architecture, to ensure PIN compatibility it would be the responsibility of the
application developer to ensure that a PIN compatiable PIC is chosen from the same family or family of devices.